RealRaspi - Augmented Reality Headset With Raspberry Pi
by Guenter1958 in Circuits > Raspberry Pi
3856 Views, 29 Favorites, 0 Comments
RealRaspi - Augmented Reality Headset With Raspberry Pi

Augmented reality (AR) is an interactive experience that combines the real world and computer-generated content. Many of us are already familiar with AR applications due to their easy availability on modern mobile computing devices such as smartphones and tablet computers.
In this instructable we will build a fully autonomous AR headset from scratch using the Raspberry Pi 5 single-board computer. We'll see what's possible and find out what the limits of this little guy are. The system is able to detect ArUco markers using OpenCV, and hand poses using Google MediaPipe. The results are rendered by the Unity real-time game engine.
The software is ready to use, just flash it to an SD card and you're done. On the other hand, if you want to change the software, you need advanced programming experience. All source code is included in this project.
It will take about a day to print and assemble all the parts. You don't need any special skills in mechatronics, the only tool you need is a Phillips screwdriver.
Supplies
1. Essential Parts:
1x Raspberry Pi 5 4GB Board (RPi 4 or less is not sufficient)
1x Raspberry Pi 5 Active Cooler
1x Raspberry Pi 5 Camera Module 3 Wide Angle 120° (The AR headset is already calibrated for this camera, if you use a different camera model you'll need to recalibrate the AR headset)
1x Raspberry Pi 5 Camera Cable 200mm (The standard camera cable doesn't fit on the RPi 5)
1x Virtual Reality Headset (We only use the goggle portion of this headset)
1x Waveshare 5,5" 2K AMOLED Display (1440x2560 pixels resolution)
1x Battery Head Strap with 6400 mAh Battery
Total costs for essential parts are approx. 350,- €/$ as of March 2024
2. Optional parts for IMU:
The Inertial Measurement Unit (IMU) determines the orientation of the AR headset in space. We're not using this device in our current project, so it's optional. However, an Android service in our software provides IMU data automatically to Unity.
1x Tinkerforge IMU Brick 2.0 (It is connected to the USB port, leaving the GPIO pins unused. Easily add additional modules, such as a GPS module)
3x M2.5 Hot Melt Brass Insert Nuts
Total costs for IMU parts are approx. 120,- €/$ as of March 2024
3. Auxiliary parts:
1x Bone Conduction Earphones (Ideal for AR because we can still hear the environment. In addition to Bluetooth headphones, the Waveshare display also supports HDMI audio output with a 3.5mm jack and 4-pin header)
Total costs for auxiliary parts are approx. 55,- €/$ as of March 2024
3D Printing of the Frame

Download the AR Headset.stl 3D printing file at the end of this chapter.
If you're interested in the original CAD file (Autodesk 3ds Max format), you can download it from Thingiverse.com.
The parts are printed on a 3D FFF printer, which should have a minimum build area of 200x200 mm (7.9x7.9").
Standard PLA is sufficient as print material. Infill = 30%, print accuracy = 0.2 mm. All parts can be printed without support.
Wait - Hair ??
Optionally, you can print hair that grows out of the AR headset. From my experience, I can tell you that it's definitely an eye-catcher.
The corresponding STL file can be downloaded below.
Mechanical Assembly

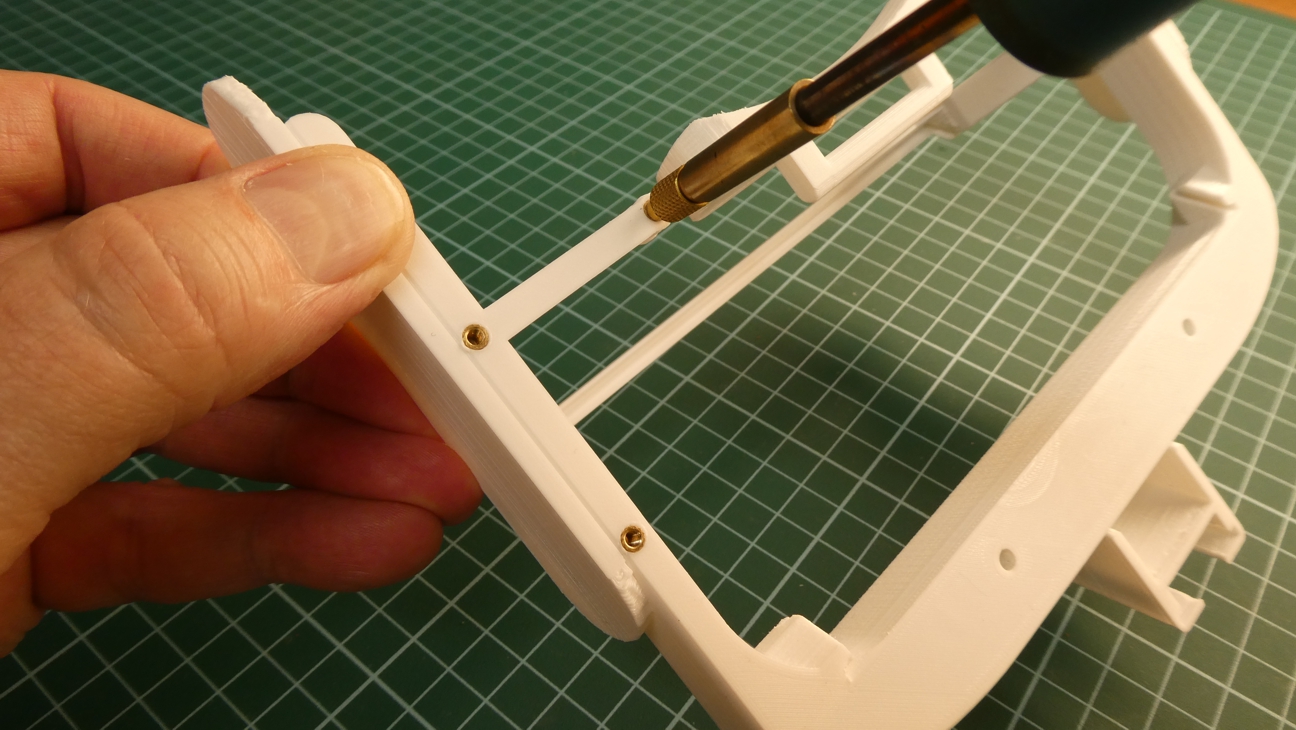
Step 2.1 (optional for IMU):
Insert 3 pcs. of M2.5 hot melt brass insert nuts into the AR frame using a soldering iron.
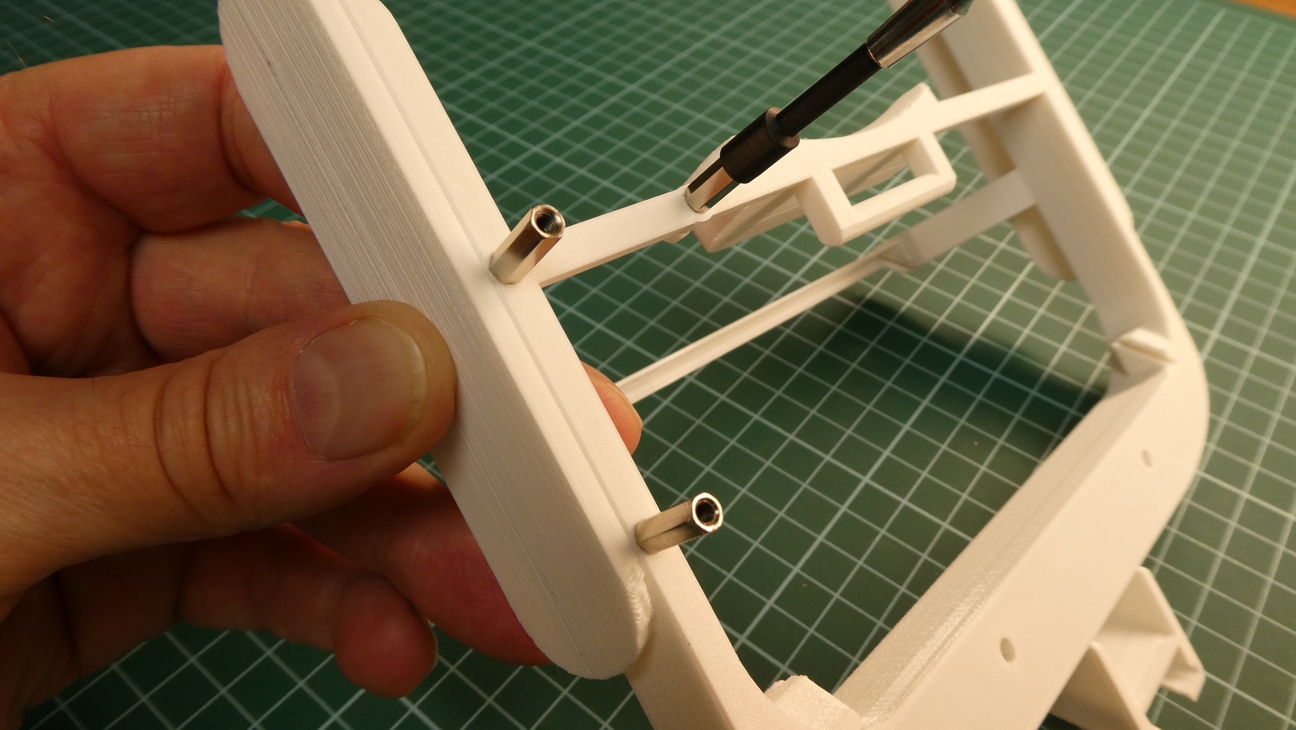
Step 2.2 (optional for IMU):
Screw 3 pcs. of M2.5 x 11+5mm standoffs into the nuts.
Step 2.3:
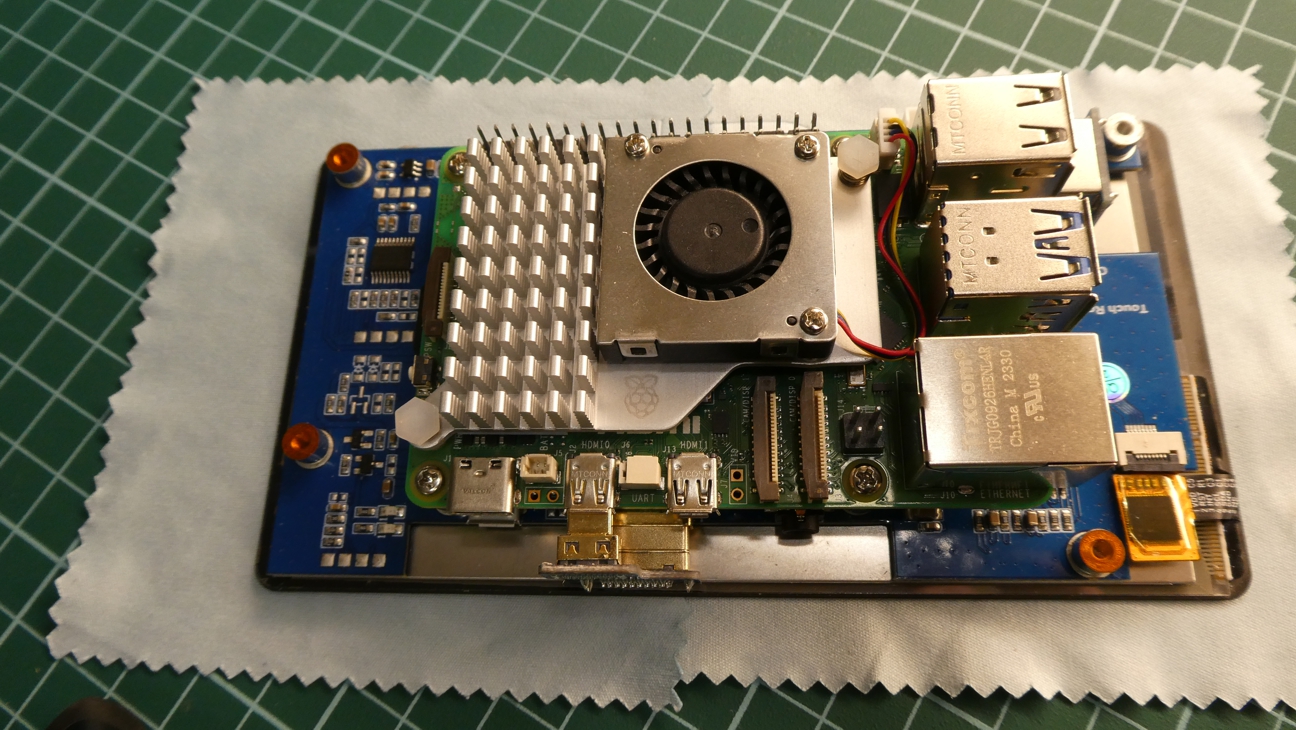
Attach the Raspberry Pi 5 Active Cooler to the Raspberry Pi 5 4GB Board.
Then mount the Raspberry Pi unit onto the Waveshare 5,5" 2K AMOLED Display as shown below. Connect the supplied USB adapter and HDMI adapter.
Step 2.4:
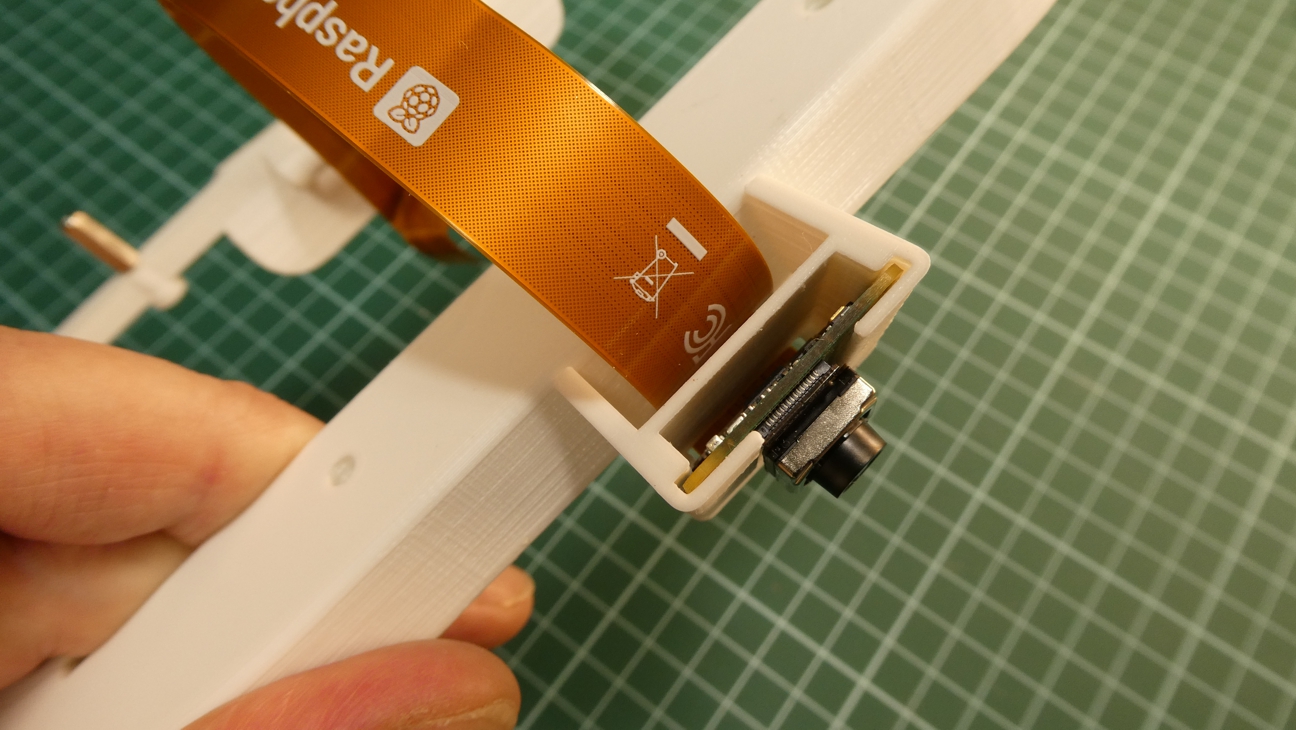
Attach the Raspberry Pi 5 Camera Cable 200mm to the Raspberry Pi 5 Camera Module 3, and insert it into the AR frame as shown below.
Step 2.5:
Connect the free end of the Raspberry Pi 5 Camera Cable 200mm to the Raspberry Pi Cam/Disp0 connector as shown below.
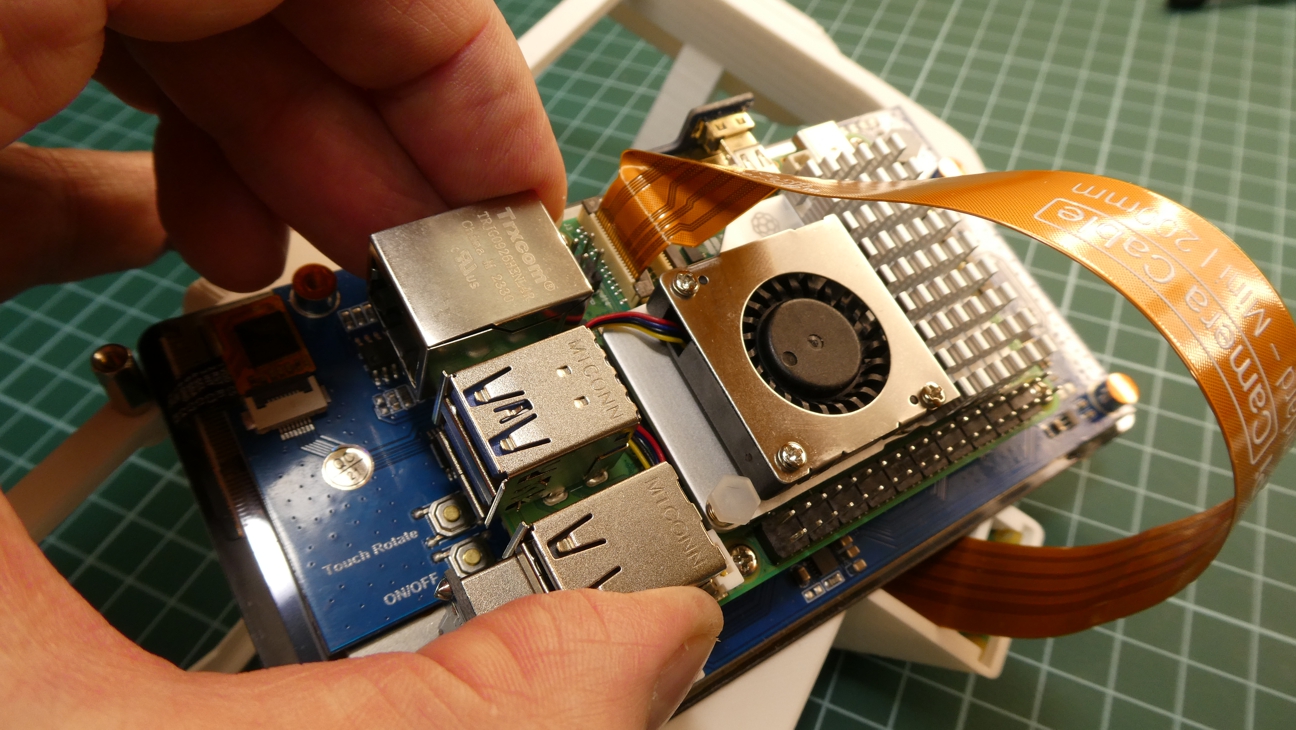
Step 2.6:
Slide the assembly into the AR frame as shown below. Be careful not to damage the flat cable on the side of the Waveshare display.
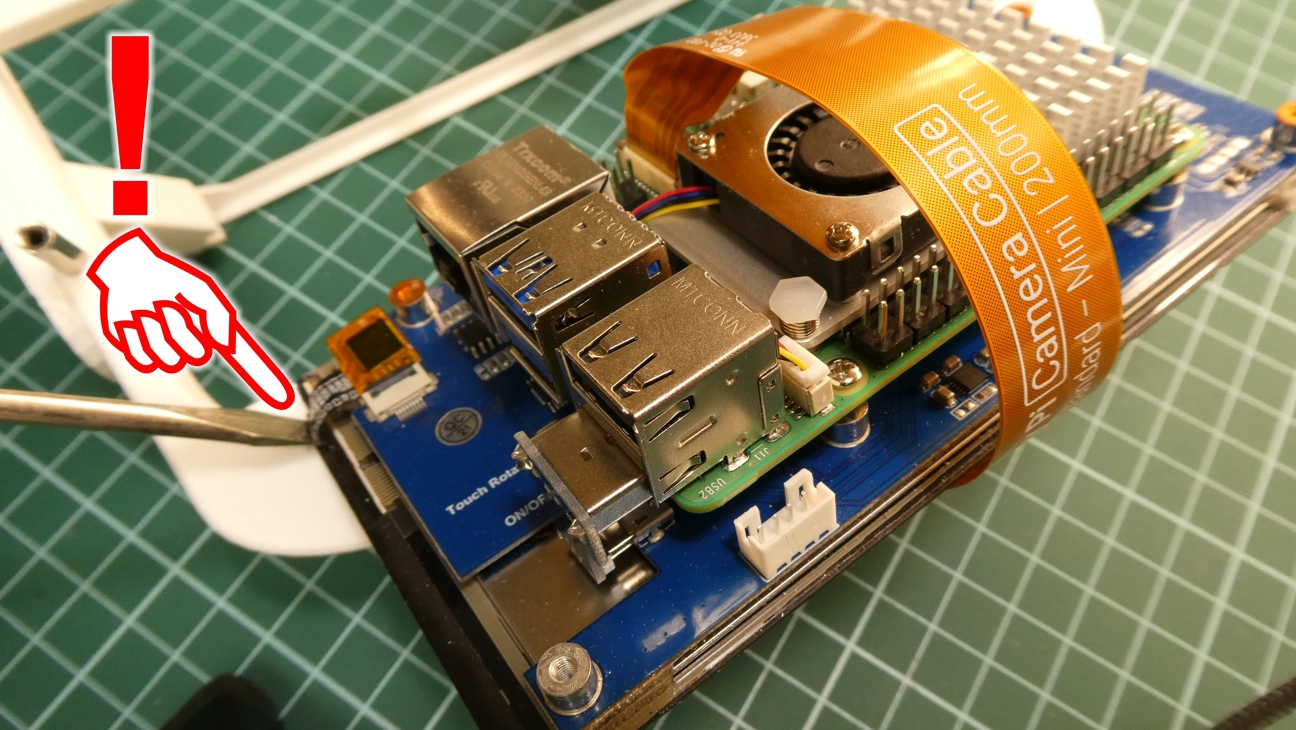
Step 2.7:
The assembly should now look like the following.
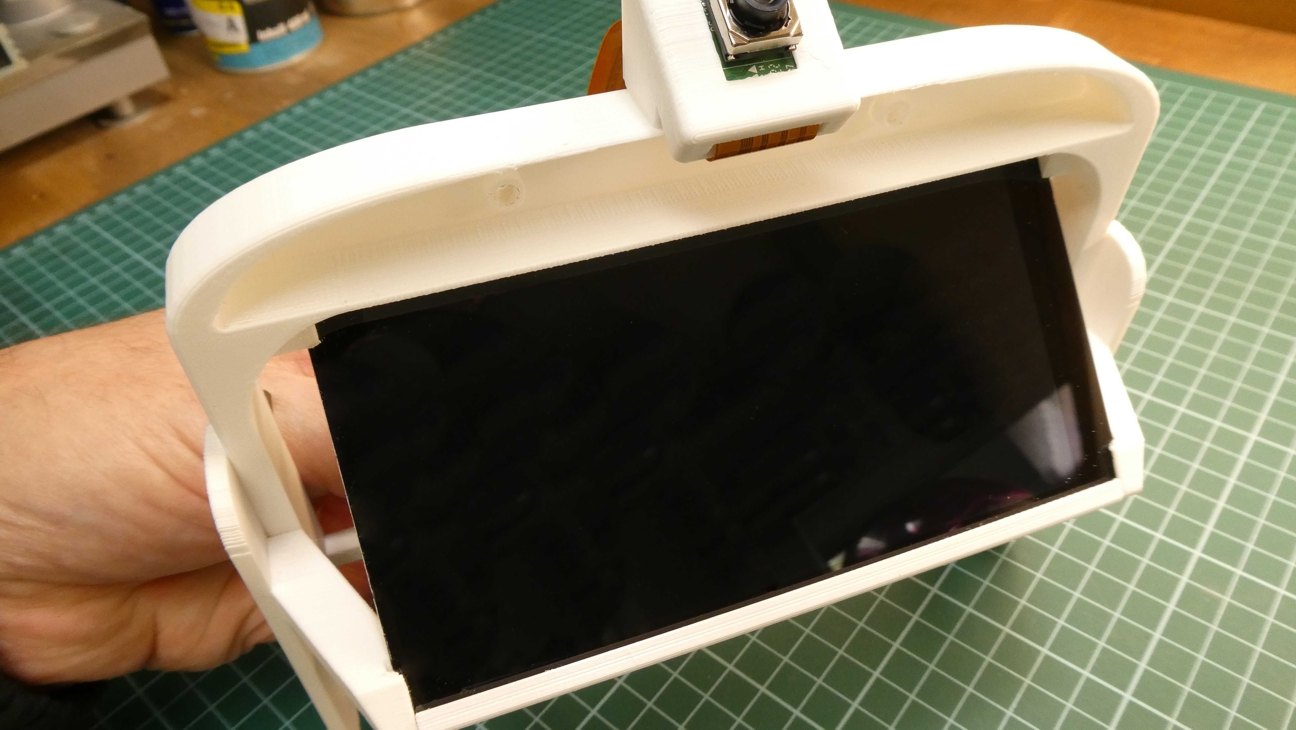
Step 2.8 (optional for IMU):
Connect the USB cable to the Raspberry Pi as shown below.
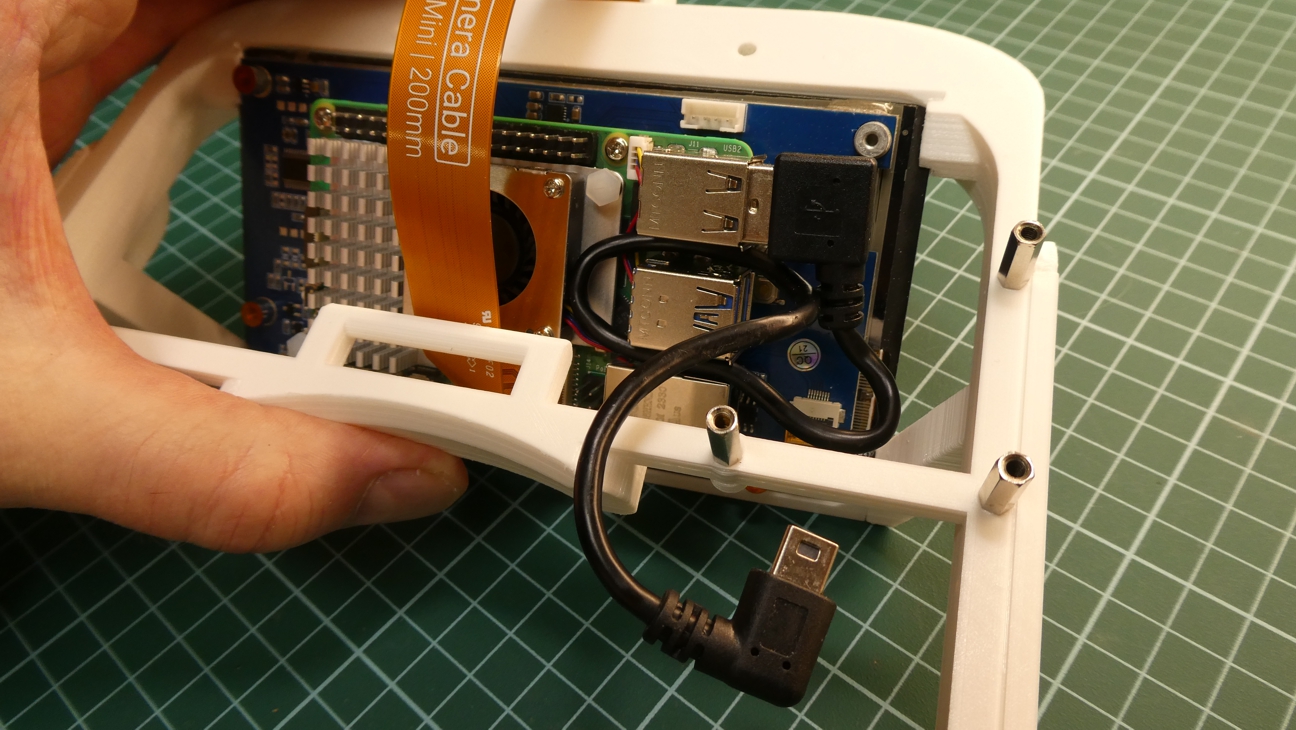
Step 2.9 (optional for IMU):
Mount the Tinkerforge IMU Brick 2.0 on the AR frame and connect the USB cable as shown below.

Step 2.10:
Snap the left and right side straps of the Battery Head Strap with 6400 mAh Battery to the AR frame, and then pass the top strap through the AR frame as shown below.
Do NOT connect the USB cable from the Battery Head Strap to the Raspberry Pi yet, as we need to flash and insert the SD-card first, as described in the next chapter.
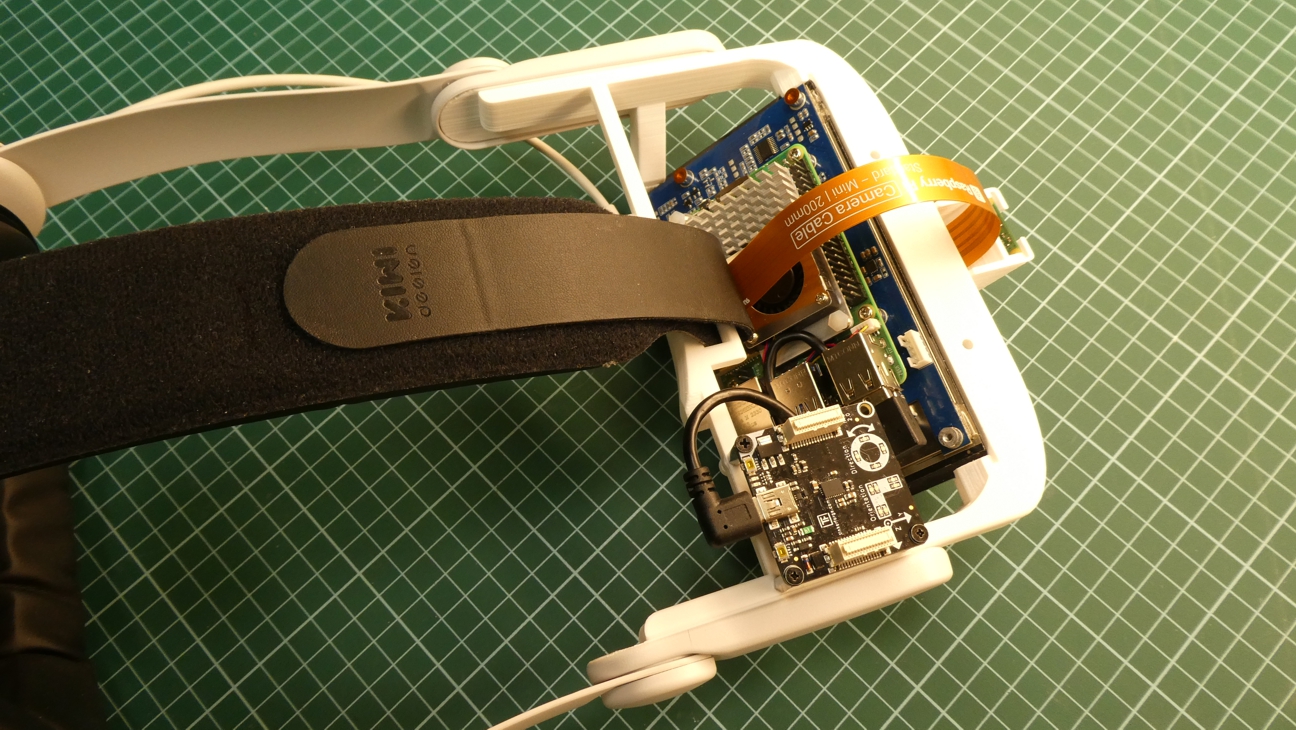
Step 2.11:
Now is a good time to place the AR headset in a suitable holder.
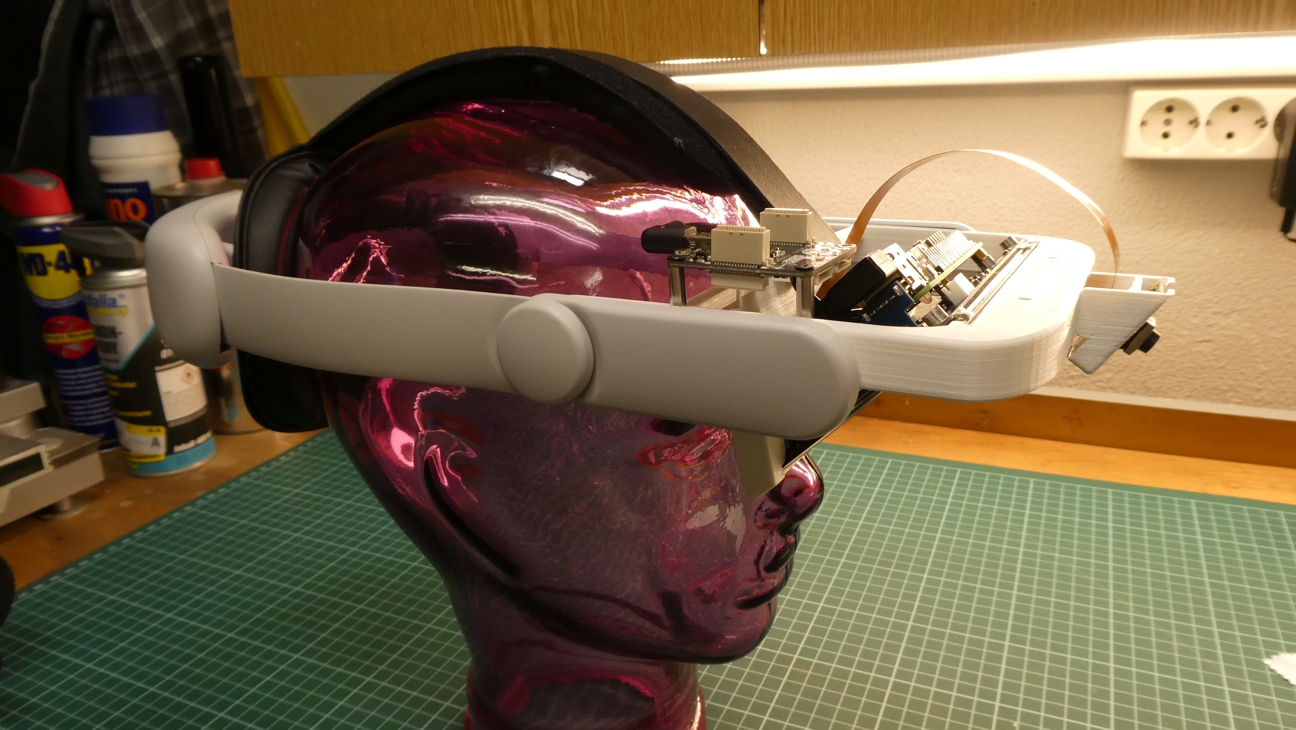
Step 2.12:
Attach the goggle portion of the Virtual Reality Headset and the printed cover portion to our AR headset with two screws as shown below.
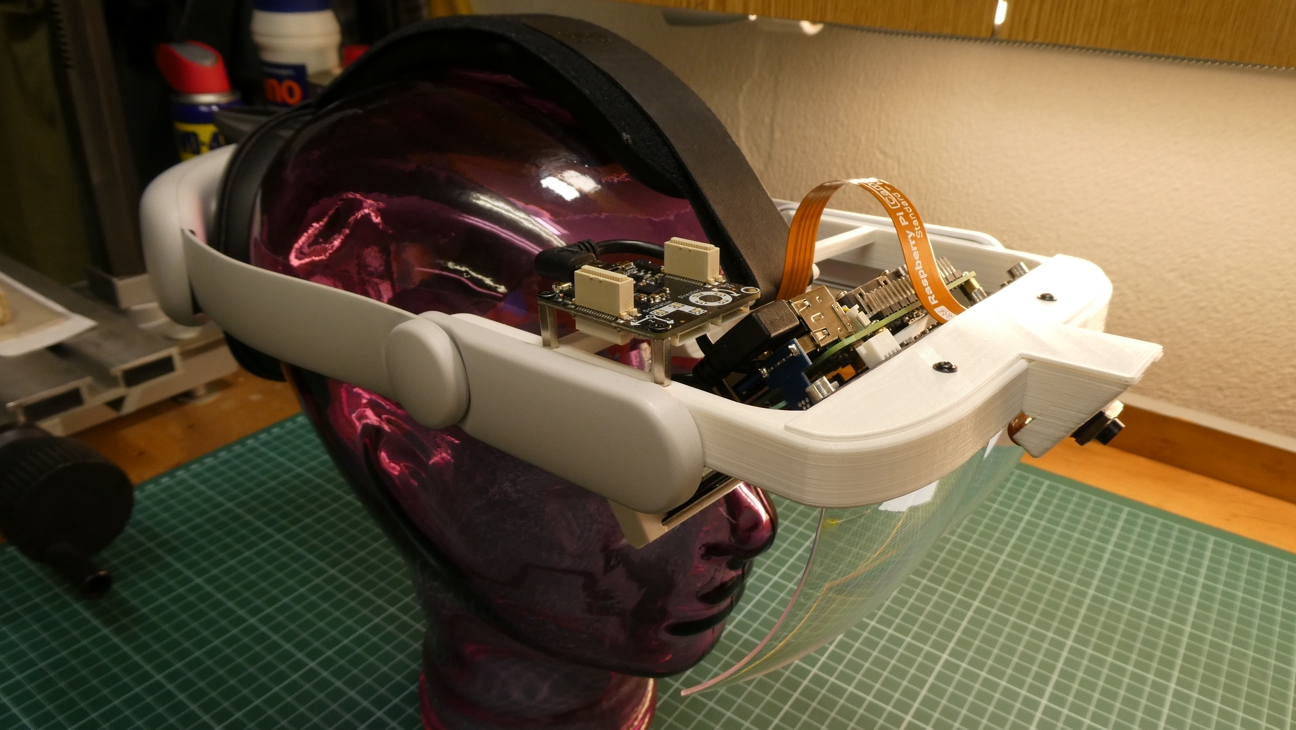
Step 2.13:
Alternatively, you can use printed hair as the cover portion, as shown below.
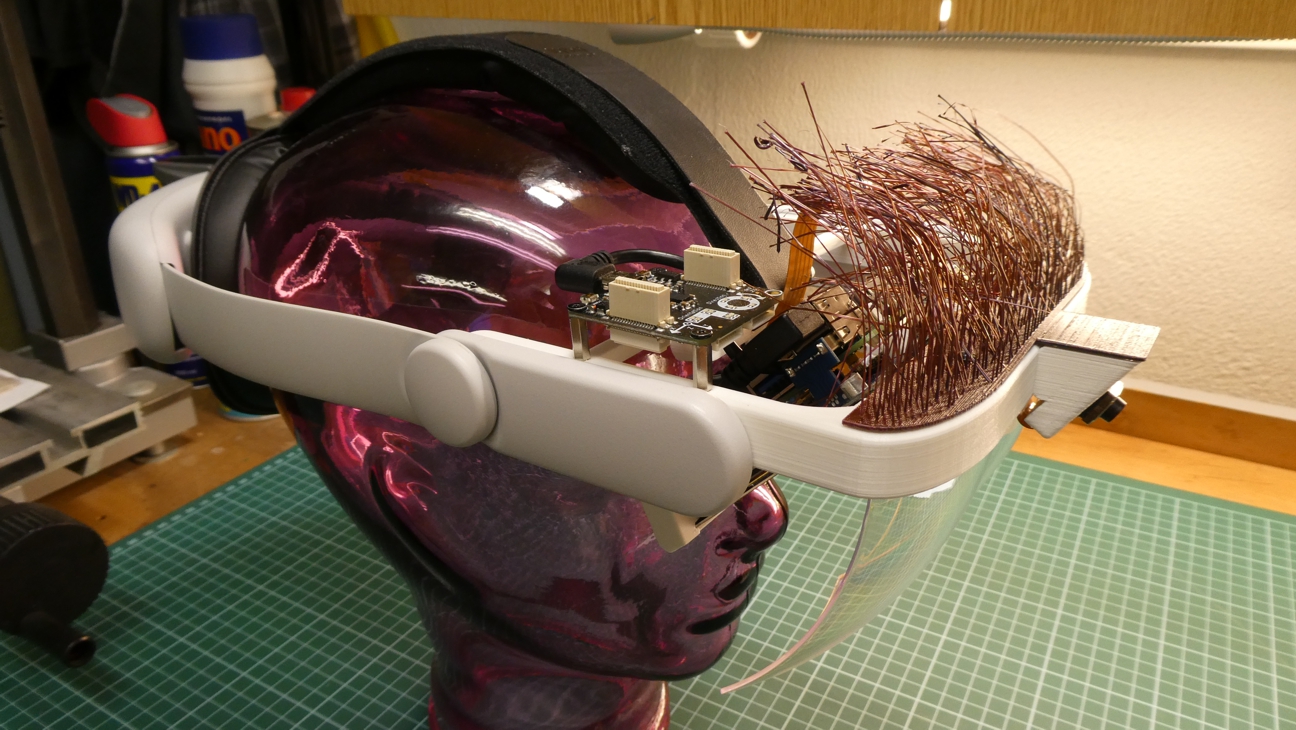
Flash the SD-card

Installing the software is quite simple. First, download the 1.5 GB ZIP-file from here.
Next, we need to write this ZIP-file to the SD-card. To do this, download and install a utility called Raspberry Pi Imager from here.
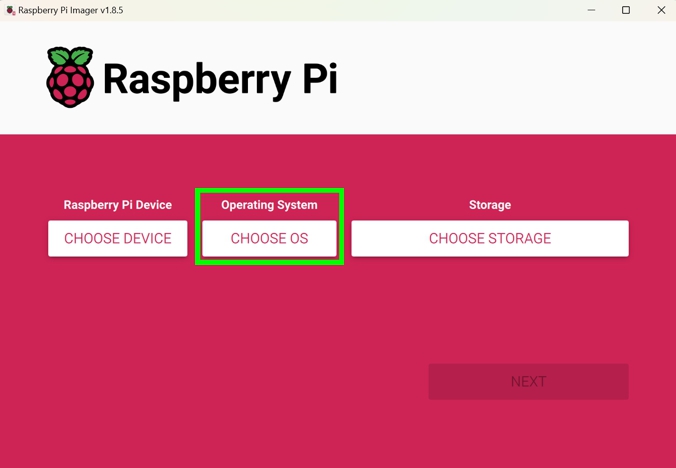
Start Raspberry Pi Imager and click on CHOOSE OS:
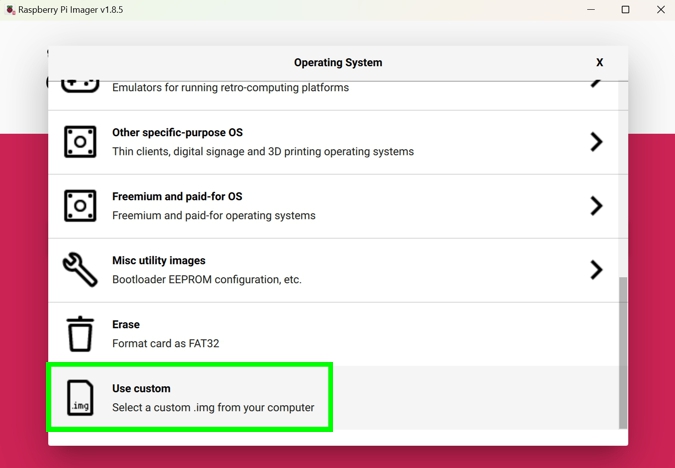
Select the Use Custom menu item, and then select the previously downloaded ZIP-file:
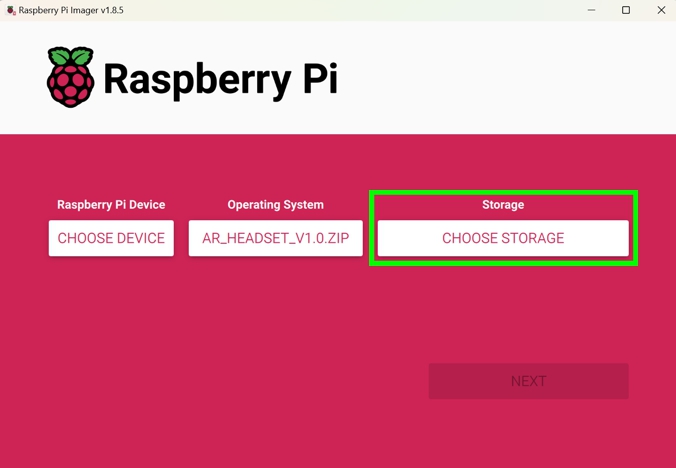
Next, click on CHOOSE STORAGE:
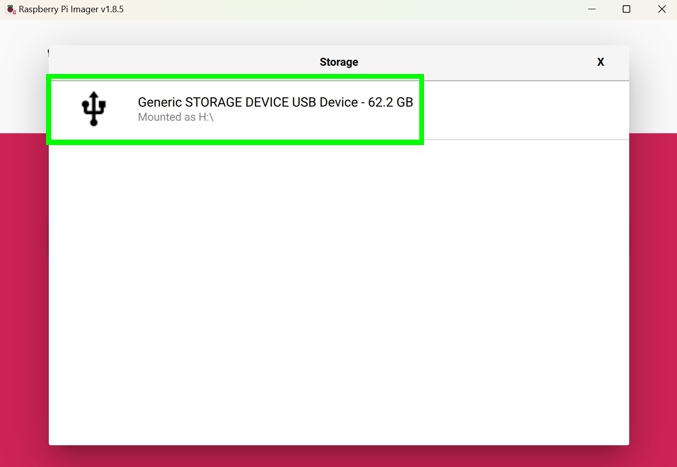
Select the SD-card you've inserted into your PC:
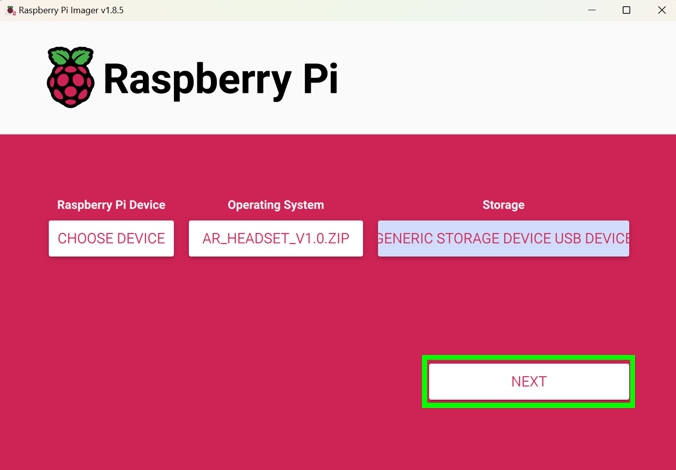
Now click on NEXT:
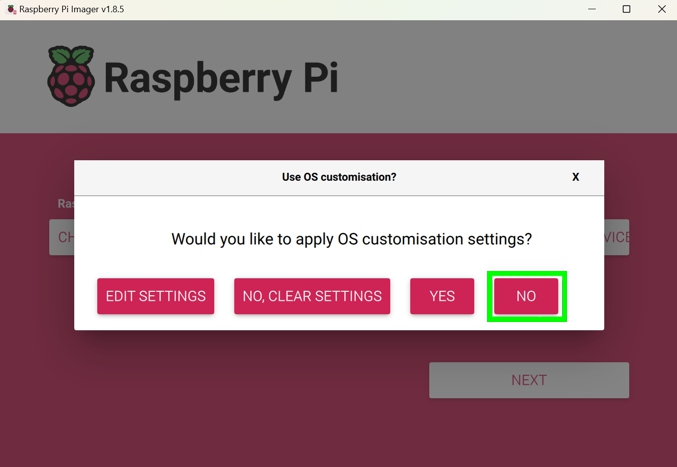
Now click on NO:
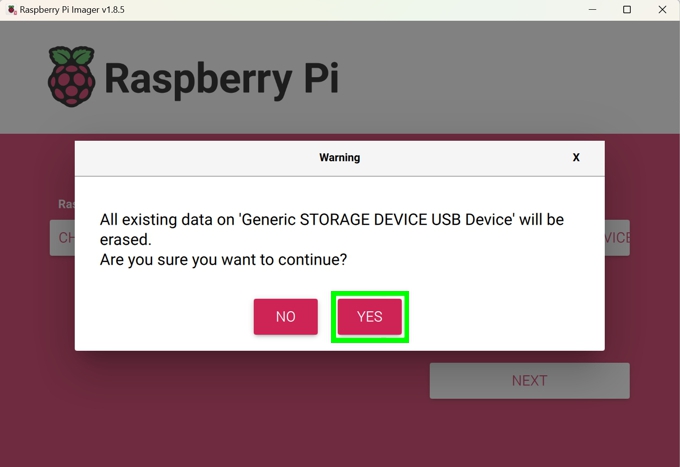
Now click YES to start the flash process:
Once the flash process is complete, eject the SD-card from your PC and insert it into the Raspberry Pi.
Print the ArUco Markers

Our AR headset is able to detect ArUco markers by using the OpenCV computer vision library. We use these markers to control the behavior of the Unity real-time game engine running on our AR headset.
At the end of this chapter, you will find a PDF-file containing four ArUco markers. The black filled square of each marker has a side length of 100mm and it is IMPORTANT that you keep this size when printing them. If you change the size, the distance estimation between the ArUco marker and the AR headset won't work correctly.
You can produce additional ArUco markers yourself on this site. Our AR headset detects the following ArUco markers: dictionary 4x4, marker size 100mm.
Downloads
Let's Rumble !

Connect the USB cable from the Battery Head Strap to the Raspberry Pi, put on the AR headset, and you are ready to go!
After booting, a small ghost will appear as a break filler. Please adjust your top strap accordingly, so that the ghost floats in the center of the goggle.
Now use the ArUco markers to switch between the apps as shown in the tutorial video at the top of this page.
5.1 Angry Birds

Use ArUco marker with Marker ID: 3.
This mini-game consists of three little do-it-yourself scenes based on the brilliant nonsense game Angry Birds.
The first scene has 25500 triangles and renders at 35-40 FPS (frames per second). The minimum acceptable frame rate in AR is 30 FPS.
The game has built-in hand pose detection, thanks to the use of the Google MediaPipe library.
The following hand poses are recognized:
- ✌"victory hand"
While in the game, this hand pose leads to the appearance of a slingshot that throws a bird to the pigs
- 👎"thumbs down sign"
When a new scene has started, this hand pose ends the game
Note that good ambient lighting and a bright background are essential for hand pose detection to work properly.
The game also provides audio. The easiest way to use the audio is to plug a headphone cable into the 3.5mm jack on the Waveshare display. You can also pair a Bluetooth headset with the AR headset. The operating system is Android, so Bluetooth pairing is the same as on Android smartphones.
5.2 Roll-a-Ball
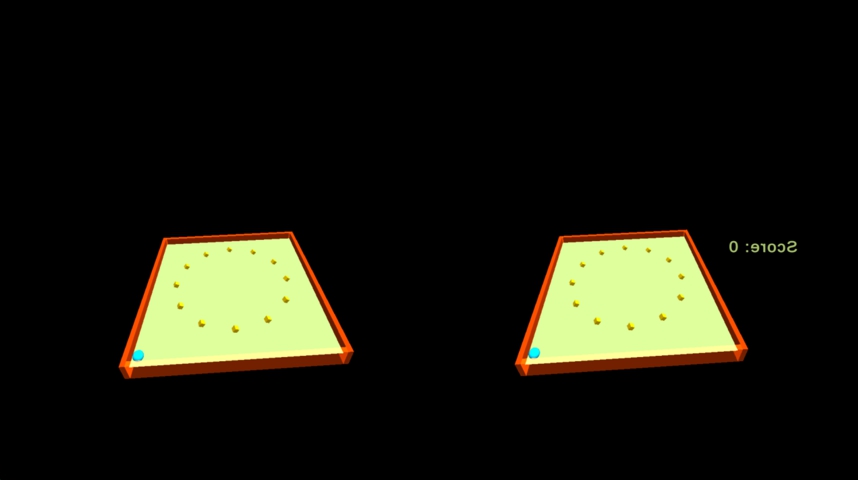
Use ArUco marker with Marker ID: 2.
This game is based on the Unity tutorial Roll-a-Ball. Roll the blue ball over the yellow targets to "eat" them all.
The scene has 1200 triangles and renders at 42-48 FPS, which is acceptable.
5.3 John Lemon
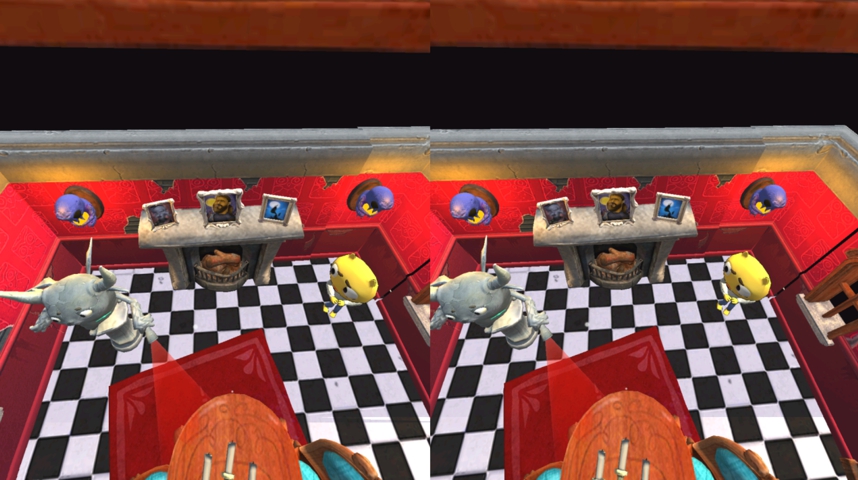
Use ArUco marker with Marker ID: 0.
This scene is part of the Unity tutorial John Lemon's Haunted Jaunt. You are looking at a spooky scene from the top down.
The scene has 122000 triangles and renders at 14-22 FPS, frame stuttering is noticeable.
5.4 The Street
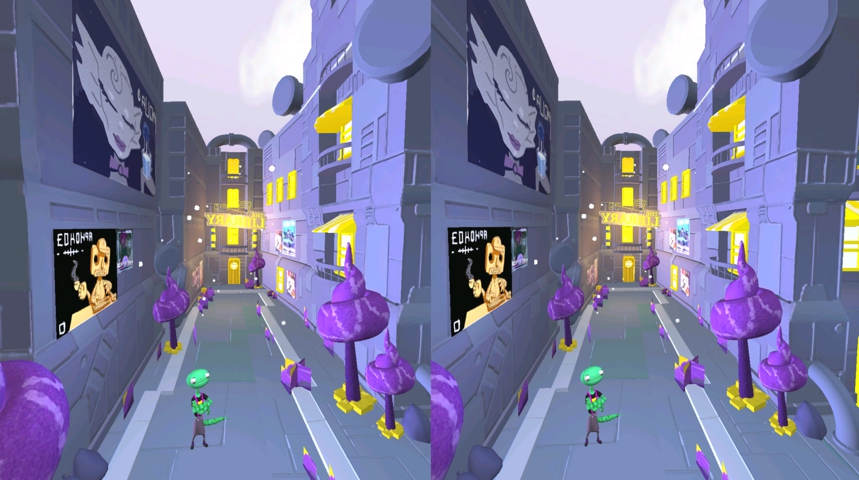
Use ArUco marker with Marker ID: 1.
This scene is part of the Unity tutorial Create a plane detection AR app. You are looking through a window at a street with a library.
The scene has 54000 triangles and renders at 14-20 FPS, frame stuttering is noticeable.
Detailed Software Description

TL;DR
If you just want to USE the AR headset, you can finish reading this guide here and have fun with it!
The following sections describe how to download and modify the AR headset source code.
6.1 The Software Structure
Here is an overview of how the different modules of the AR headset work together:
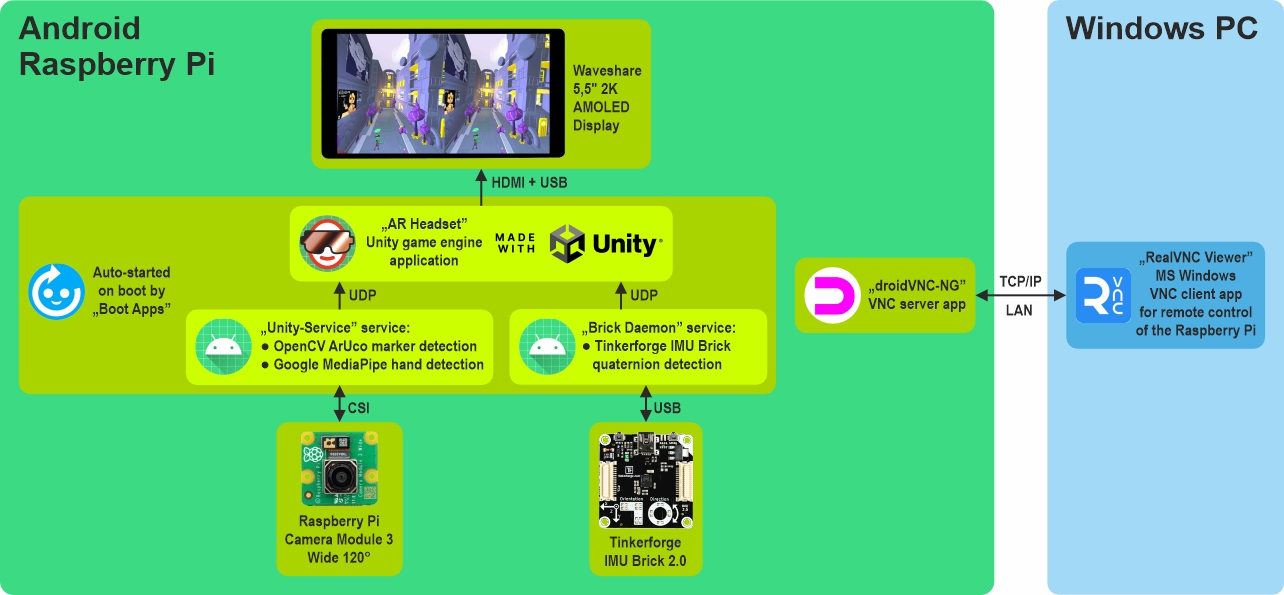
Android 14 runs on the Raspberry Pi instead of the usual Linux-derived Raspberry Pi OS. This is necessary, because Unity still doesn't support Linux on ARM64, but it does support Android. Fortunately, there is a very good port of the Android-based LineageOS for the Raspberry Pi, which we use in our project.
There are two Android services running in the foreground that do the hard work of processing the data from the camera and the IMU and passing the results to Unity.
The AR headset itself is programmed and remotely configured from a PC via an Ethernet LAN connection. I've been using a Windows PC for development, but from the software side, it should be possible to use MacOS or Linux as development platforms as well.
6.2 RealVNC Viewer
Install the RealVNC Viewer on your PC. This program transmits the AR headset's graphical desktop to the PC for remote control. Alternatively, you can use the Waveshare display for touch input, but this is not very convenient.
The AR headset already has a VNC server application called droidVNC-NG installed and running, it doesn't need any further adjustments.
Connect the AR headset and the PC to the same network and open the RealVNC Viewer. Click on File → New connection... and enter x.x.x.x:5900 in the VNC Server: field, where x.x.x.x is the IPv4 address of the AR headset. One way to determine the IPv4 address is to tap the following items on the Waveshare display: Settings → About tablet → IP address.
You can leave the other RealVNC Viewer settings unchanged.
6.3 Unity
Download and install the Unity Hub.
Start the Unity Hub and select Installs → Install Editor, and install Unity Editor 2022.3.19f1.
In the Unity Hub select Projects → New project → 3D Core → Create project and create a new Project using Unity Editor 2022.3.19f1.
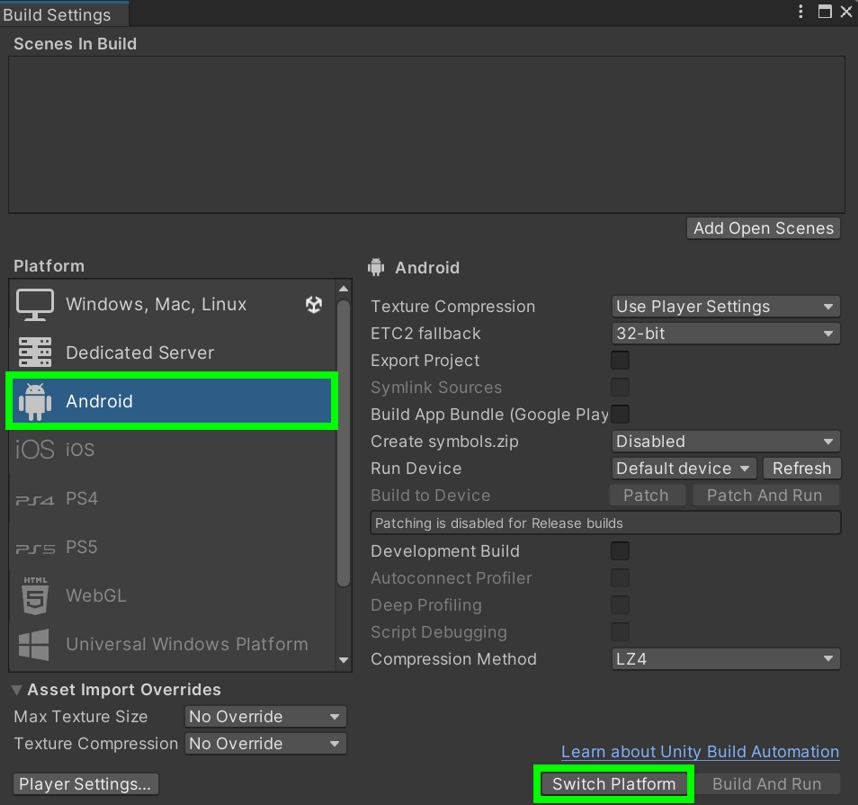
In Unity select File → Build settings... → Android → Switch Platform:
Select Window → Package Manager → Packages: Unity Registry:
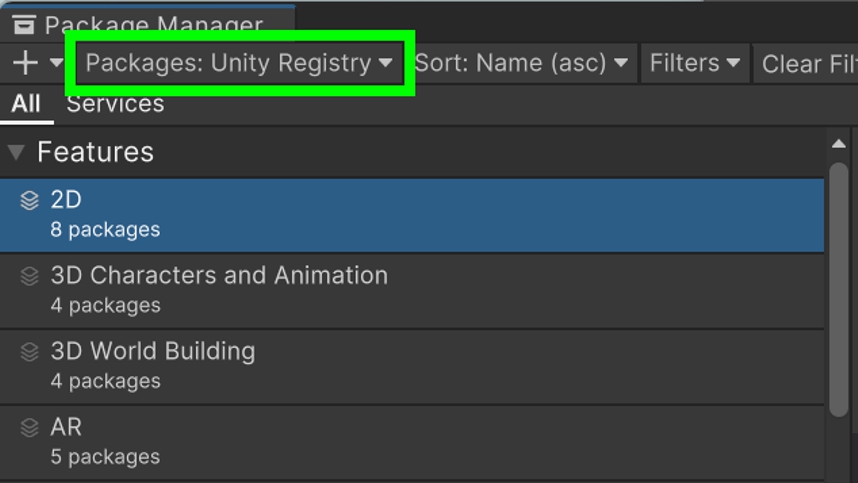
Install the following packages in Package Manager:
- Burst
- Shader Graph
- XR Plugin Management
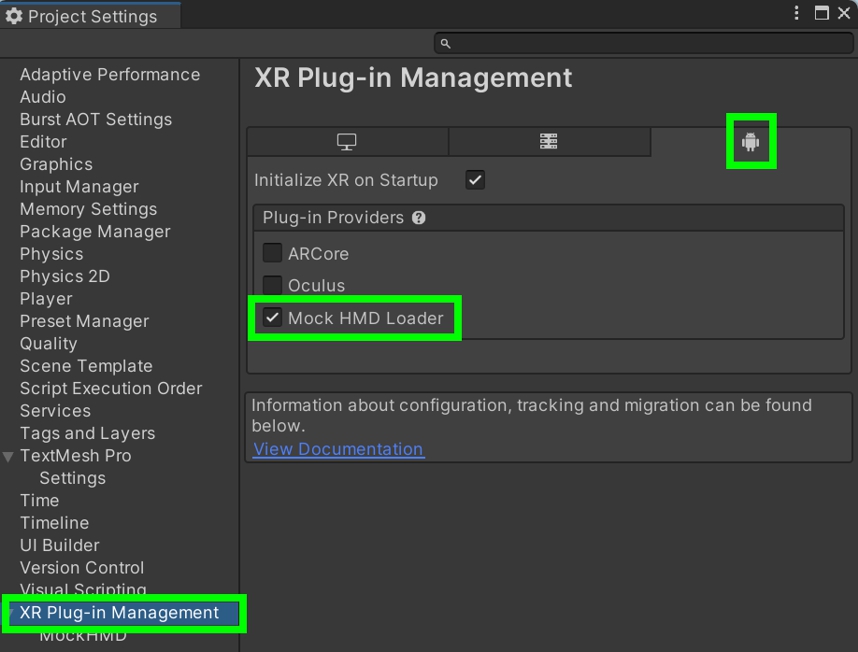
Select Edit → Project Settings... → XR Plug-in Management. In the Android settings tab activate the checkbox Mock HMD Loader:
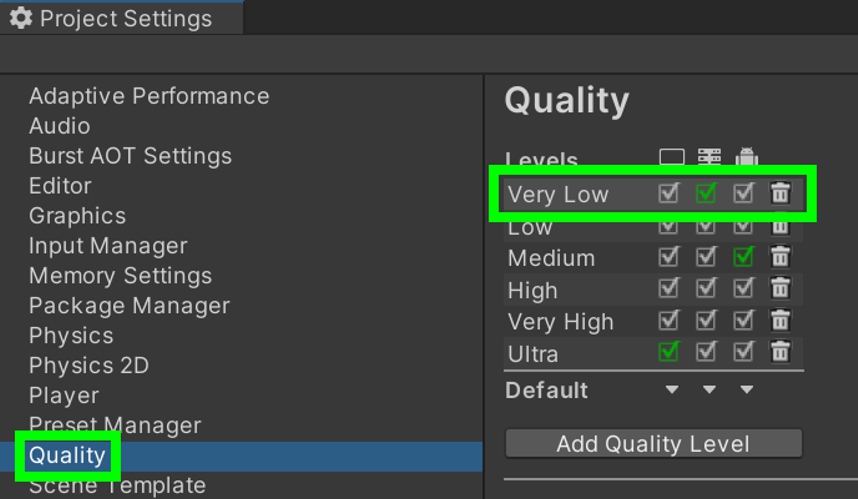
Select Edit → Project Settings... → Quality → Very Low:
Download the ARHeadset.zip file from here and unzip it.
Select Assets → Import Package → Custom Package... and choose the previously downloaded file ARHeadset.unitypackage. This will load all assets and dependencies into your project.
This package can also be found on GitHub.
That's it, now you're ready to edit the project and deploy it to the AR headset. Please note that this is a genuine Android project, you cannot run it in the Unity editor, only on the Raspberry Pi.
6.4 Android Services
The AR headset runs two Android services that provide Unity with sensor readings:
- Unity-Service:
Performs ArUco marker detection using OpenCV and hand pose detection using Google MediaPipe
Source code is available on GitHub
- Brick Daemon:
Performs quaternion detection of the Tinkerforge IMU Brick 2.0
Source code is available on GitHub
The source code of these Android applications is developed in an application known as Android Studio.
Download and install Android Studio from here.
Launch Android Studio and follow these steps to import the source code from GitHub.
Click the Get from VCS button:

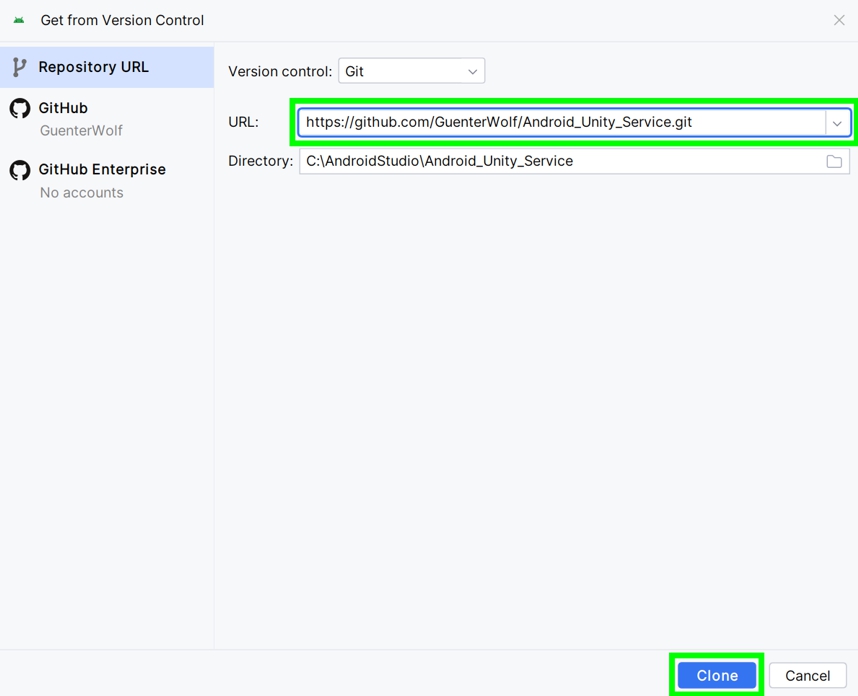
Then paste the GitHub URL into the URL: text box, and click on the Clone button:
Wait for the project to automatically load into Android Studio.
Please use either of the following GitHub URLs:
- https://github.com/GuenterWolf/Android_Unity_Service.git
- https://github.com/Tinkerforge/brickd.git
Conclusion
Games running smoothly on a real-time engine (Unity), while simultaneously doing image processing (OpenCV) and deep neural networking (Google MediaPipe), all together on a cheap single-board computer (Raspberry Pi) ... I was really fascinated that this is possible nowadays.
But people may ask, "What is this stuff good for?"
Answer for the nerds: A.M.D.G.
Answer for the rest: Experimenting with cutting-edge technology and playing with things that were impossible not so long ago is exciting and fun!